How to Install
Record Props ON A WALL
The wall mount display takes under 10 minutes to install.
STEP 1: Find the perfect place on the wall. Drill a small guide hole (1/8” or 3–3.2 mm) to see if you hit a stud – if so, you can skip the drywall anchor. If not, increase to (5/16” or 7.4 t0 7.8 mm), then insert the drywall anchor and screw into drywall until it is entirely flush with the wall. Then line up the Small X Mount over the hole. The small x should also lay entirely flush against the wall.
Tip: Consider the placement on the wall. Your screw will be located at the exact center of the vinyl record you are displaying.
STEP 2: Take the Small X Mount and line it up over the hole / drywall anchor with the open side of the keyhole facing outward toward you, and the flat side against the wall...
STEP 3: Prepare your screw with the washer on, insert the screw and washer combo through the Small X Mount and into your pre-drilled hole / anchor...
STEP 4: Use a screwdriver to tighten until the Small X Mount is completely secured to the wall. The Small X Mount should be flush and tight, unable to easily move or rotate...
Tip: Now is a good time to use a level for making any minor adjustments so that the Small X Mount is perfectly straight.
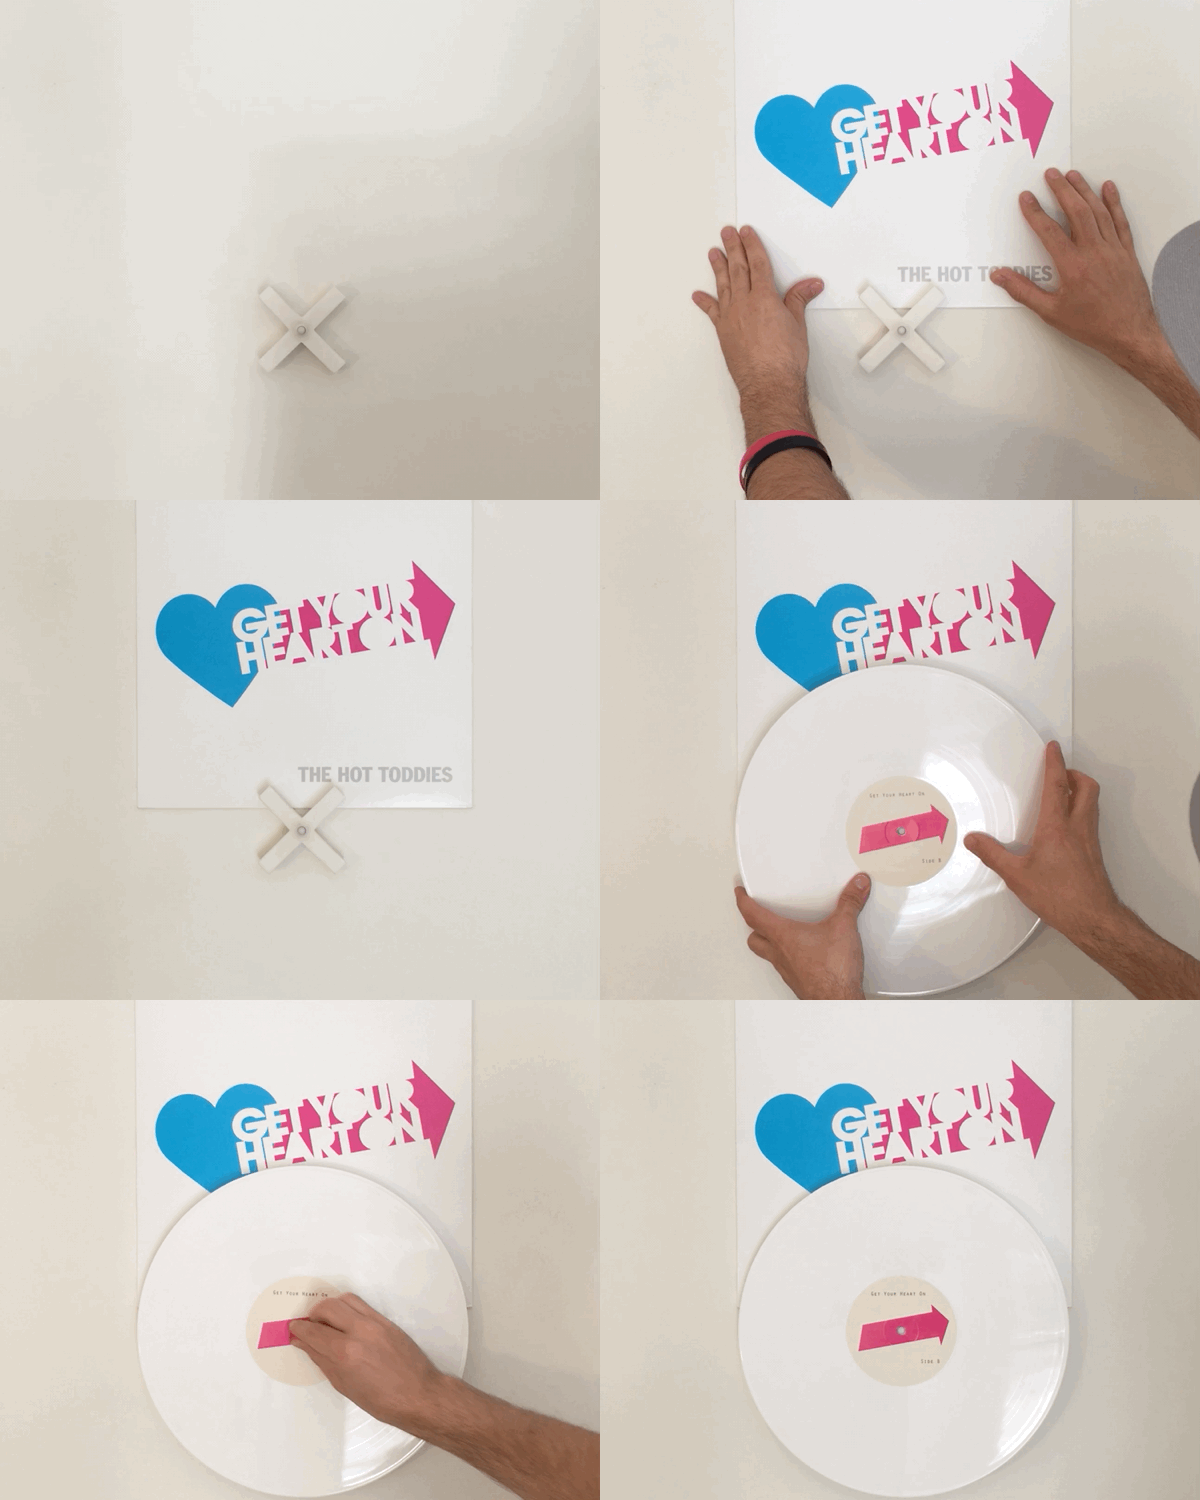
STEP 5: Place the Large X over the Small X Mount, then insert the Pin Lock through the keyhole and twist clockwise until the Large X is held securely to the wall.
STEP 6: Grab an album, slide the cover down against the wall, behind the Large X and then carefully mount the vinyl record on the Pin Lock, and lock into place by pushing on the center of your album (label) until it "pops" over the protective bumper.
For tighter fits, turn clockwise as you push the center label toward the wall.
Tip: To avoid unlocking your pin, just remember to always turn records clockwise, like a spinning record.
When Record Props are first installed, some records may feel tight on the protective bumper. Over a few repetitive uses, the bumper will continue to wear in, and records will become even easier to pop on and off. The natural wear of the rubber will create a texture that naturally holds records in place securely.
CHANGING Vinyl RECORDS
Removing Your Vinyl: Changing records is quick and easy. Grab your vinyl record at the edges and turn clockwise as you gently pull outward, toward yourself. It will "pop" off, ready to play or store away.
Tip: Some records may be tighter than others. Feel it out and continue turning clockwise while removing. You've got this.
Switch Sides: You can easily switch the Large X to change between single album sleeves and thicker double LPs or gatefolds. Twist the center Pin Lock counter-clockwise to release the Large X and then rotate 180 degrees and reattach.
Tip: For single record album covers, have the larger protruding arms of the Large X on the top side (toward your ceiling). Or for thicker, double LPs and gatefold album covers, have the larger protruding arms on the bottom (toward your floor).
And then share your setup with us by tagging @RecordProps on Instagram!
Troubleshooting: Have questions or trouble with your install? Send us a note anytime. We're here to help.


